OrgNice turns a Google Sheet into a live staff directory and org chart — no import, no manual drawing. This walks you through setting one up, from an empty account to a shared, live result, in one sitting. For a broader overview of what OrgNice does, see What is OrgNice?
What you’ll need
- A Google account
- A Google Sheet with your organization’s data (name, ID, who reports to whom) — or use OrgNice’s sample template if you don’t have one handy
- About 10 minutes
Don’t have a sheet ready? Use OrgNice’s sample template — a fictional UK school’s staff roster, with both employees and volunteer governors, that’s set up with a clean reporting hierarchy. It’s what the screenshots on this page use.
Create your first project
From your OrgNice home page, paste the URL of a Google Sheet into the field at the top and hit Enter:

Don’t have a sheet ready? Click Start from template instead — it creates a project pre-filled with a sample dataset so you can follow along with no setup of your own.
Either way, OrgNice creates a project and asks for permission to read the Sheet:
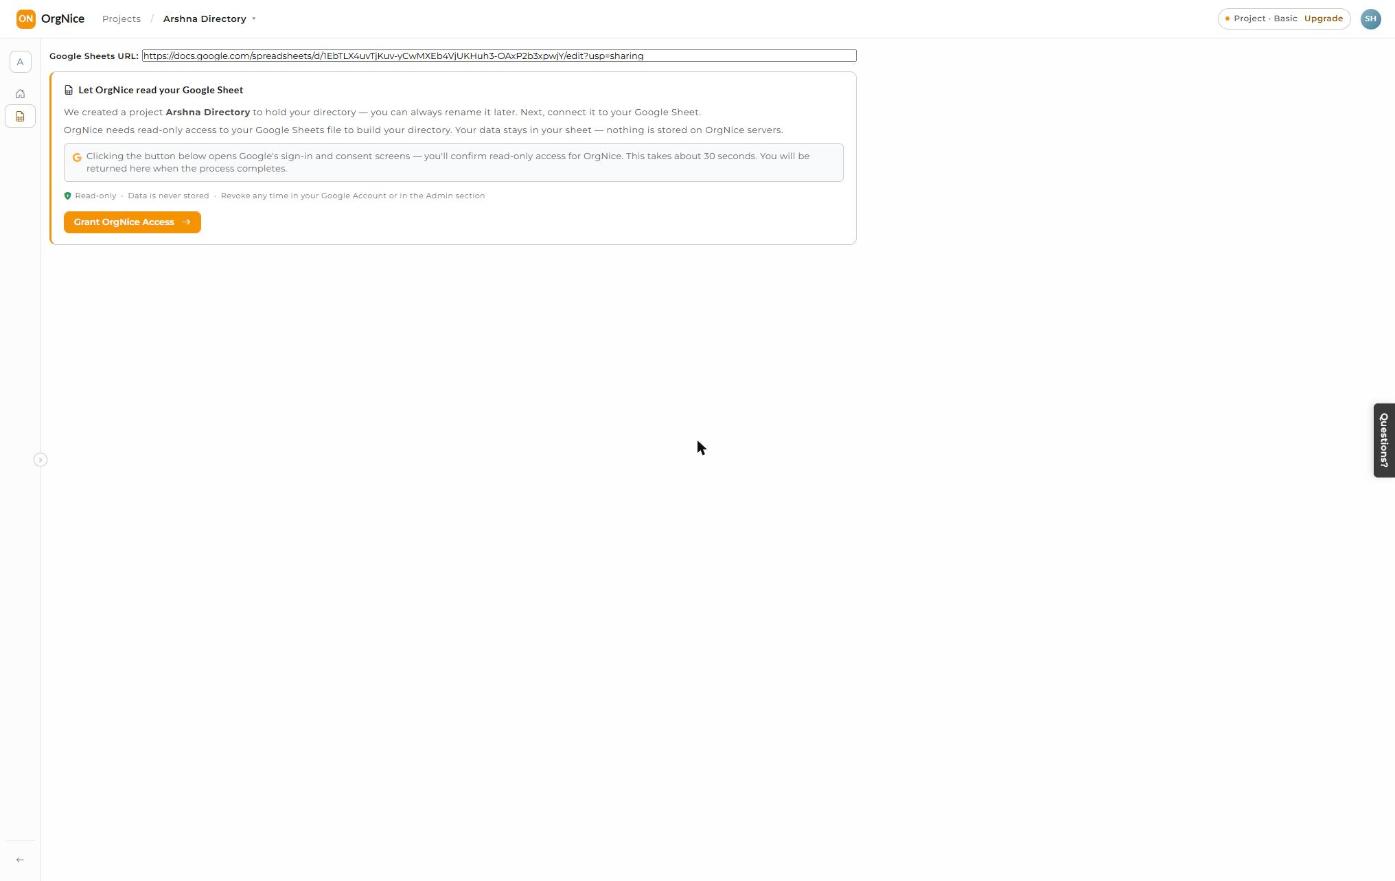
Click Grant OrgNice Access and follow Google’s sign-in and consent screens — this confirms read-only access for OrgNice. You’ll be back in OrgNice in about 30 seconds.
Inside the Setup screen
As soon as access is granted, OrgNice reads your sheet and automatically builds a complete configuration — no input required. You land on Setup, which stays available afterward as the control center for how your directory and chart look, not just a one-time connection step:
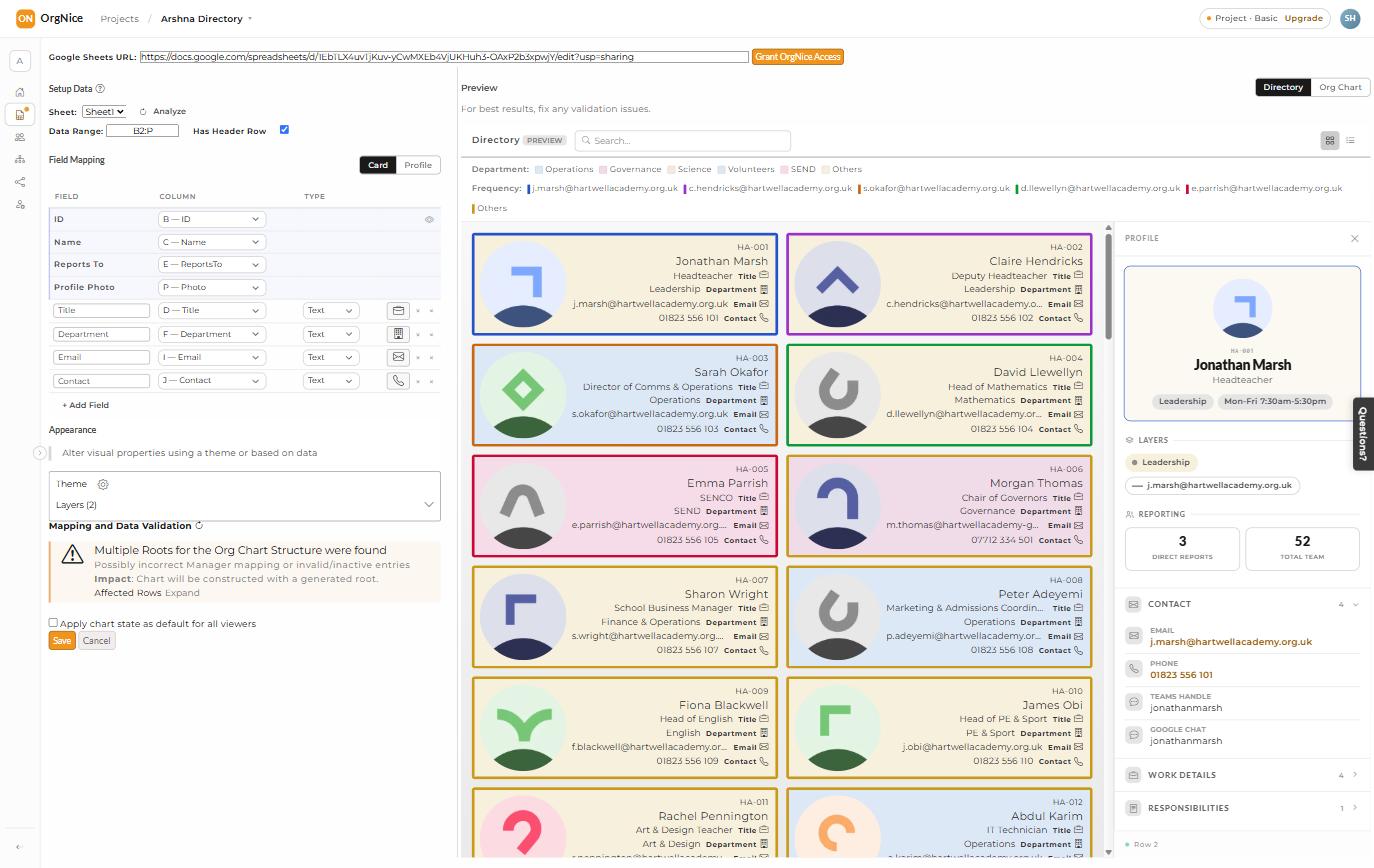
The left panel is where mapping and appearance live:
- Field Mapping controls what shows on each Card — the same mapping powers both the org chart node and the directory card for a person, since they’re two views of the same data.
- Switching to the Profile tab configures the Profile panel instead — the fuller view someone sees when they click into a person, with sections like Contact, Work Details, and Responsibilities.
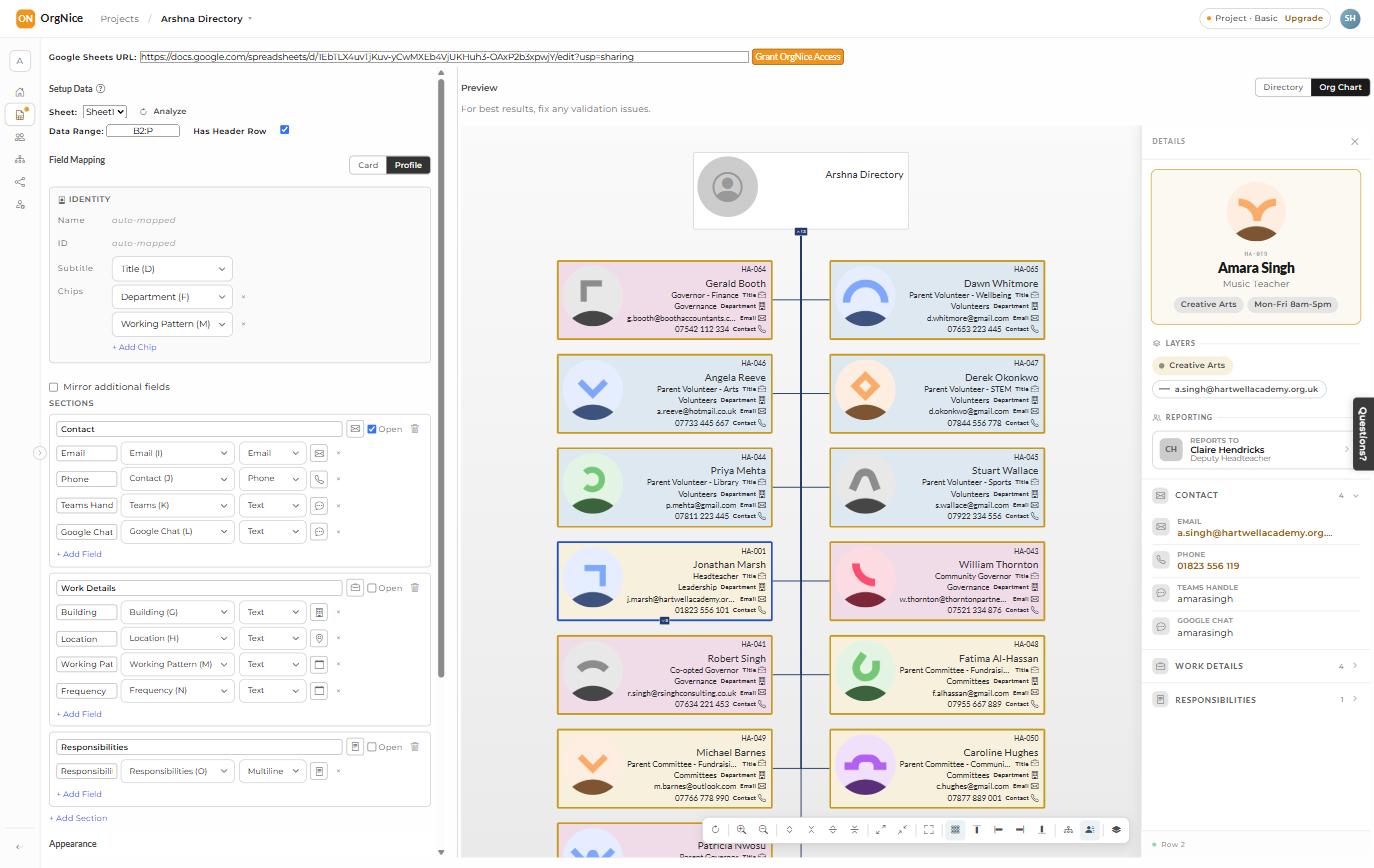
- Appearance sets the theme, and Layers apply conditional formatting — coloring cards and nodes by department, team, or any category in your data.
Everything here starts auto-configured from your Sheet, but none of it is locked in. You can adjust the mapping, change the theme, add or remove layers, or edit additional fields at any time to make the directory and chart your own — see Configuring Additional Fields, Appearance, and Layers.
Note: a few features here — profile images and layers among them — depend on your plan. See Pricing for what’s included in each tier.
When you’re happy with the mapping — or just want to see the auto-configured default — click Save at the bottom of the left panel.
See your result
Saving takes you to the live views: a searchable staff directory,
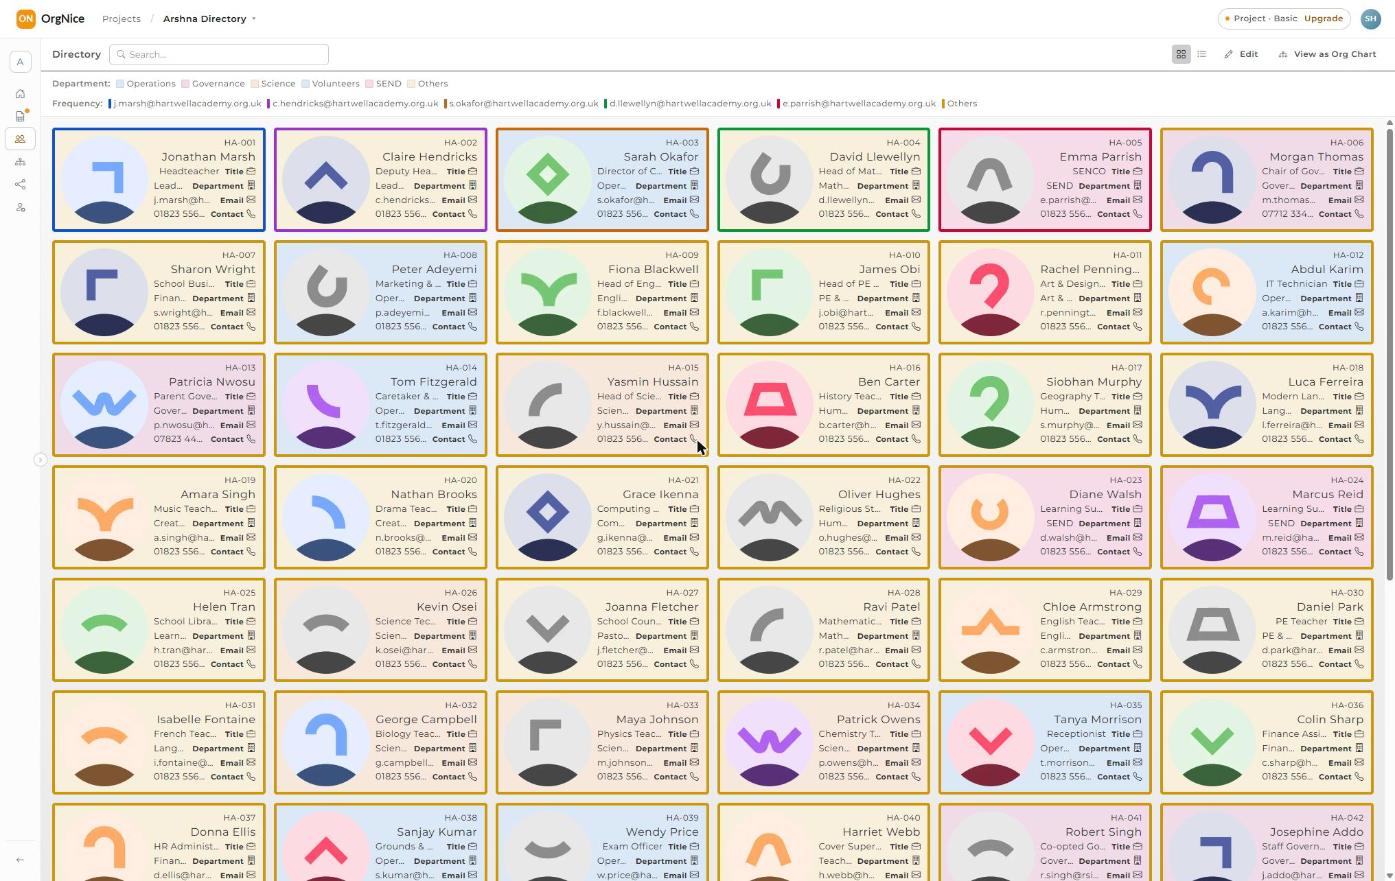
and an org chart showing the reporting hierarchy.
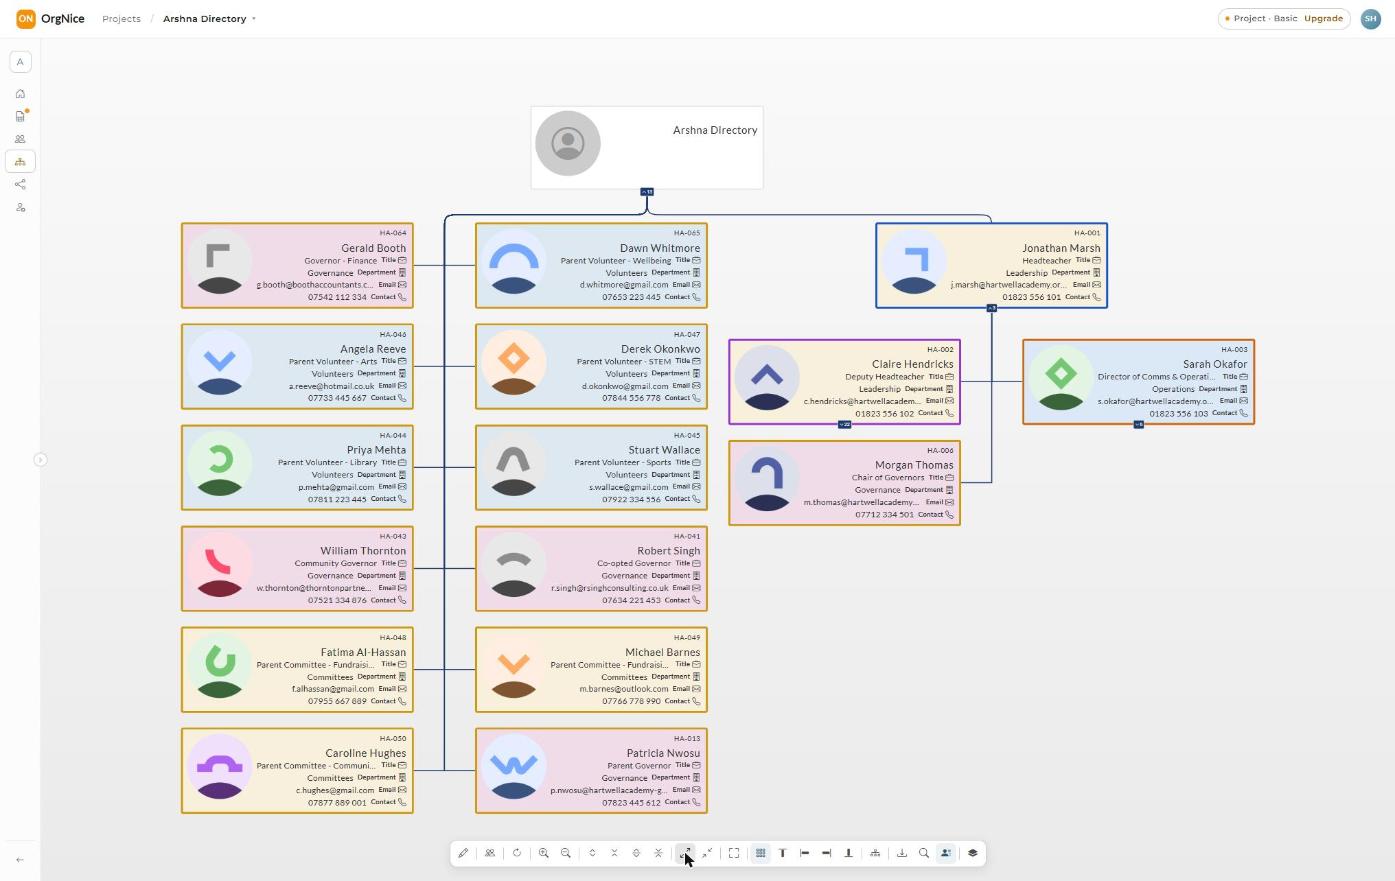
If your data doesn’t have one single, clean reporting line — common with volunteer boards, committees, or flat teams — OrgNice still generates a usable chart; it groups anyone without a clear manager under a placeholder root rather than failing.
Share it
Open Sharing from the left navigation to control who can see your directory and chart — specific people by email, your whole organization, or a public link.
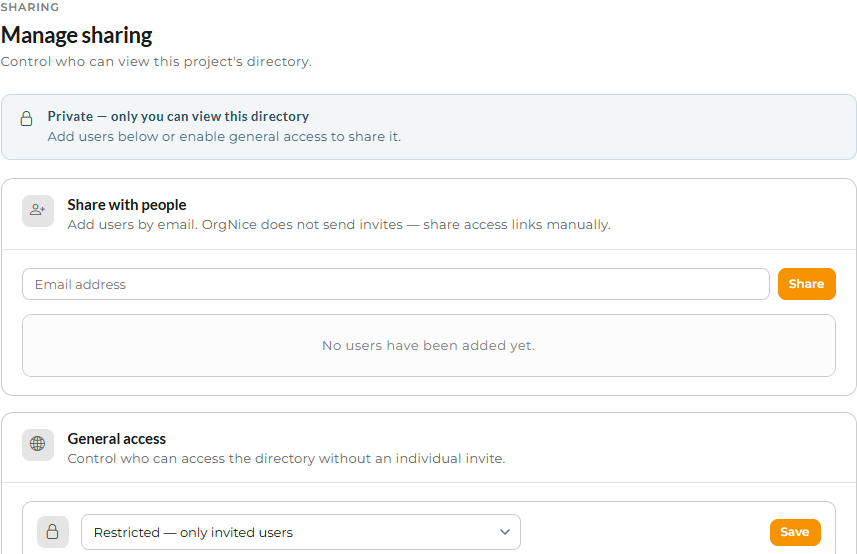
See Sharing for the full breakdown of access levels and embedding.
What happens next
Your Sheet stays the source of truth. Edit it, and the next time anyone views the directory or chart, OrgNice reads the current state — there’s no re-sync step. You’re the one editor of the project’s setup and configuration; everyone else you share with gets view-only access. For the fuller picture of how projects, updates, and ownership work, see The OrgNice Model.